How to build a retaining wall in your backyard
Retaining walls are great solutions for a sloping yard. Pools, patios and play areas all need a solid, flat surface on which to exist. With the right retaining wall design, your family can enjoy your backyard safely.
 There are a few considerations before beginning a garden or landscape retaining wall design project. The type of wall you will build depends on the slope of the ground above the wall, the type of soil in your yard and how much soil will be weighing down on the wall when it is complete.
The higher the wall you plan to build, the more force will be exerted upon it by the hillside the wall is retaining. The force could become so great that it will push the hillside over the top of your wall and crush it. For these reasons, anyone needing to build a wall higher than four feet should consider hiring experts.
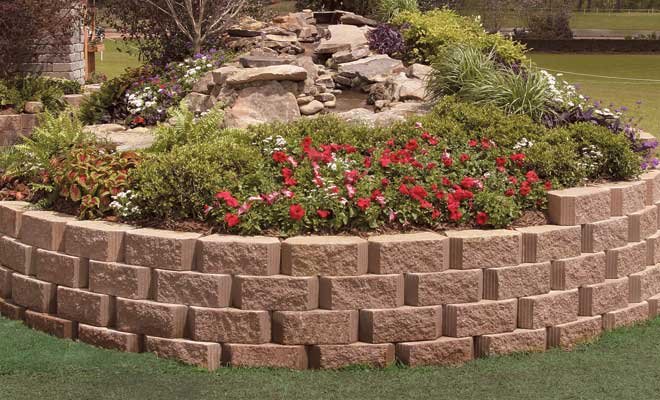
There are a number of different colors and styles of retaining wall stones. Before you settle on a final decision for your yard, take a drive around the neighborhood and see if there are any ideas you could see in your yard.
Most retaining walls are made from wood, natural stone or concrete. For the beginner, consider the pre-cast concrete wall stones. These stones are made with a lip on the back that locks them together without any mortar. The stones generally resist pressure from dirt and give the wall a “step back” and curved look. The biggest drawback to this design is its height. The interlocking stones are not generally recommended for walls higher than three feet. Seek professional advice about the correct materials and price estimates before beginning the project. A landscape design company will help you make the best decision for your yard and your budget.
Should you choose the inter-locking stones, there are a few items you need before leaving the landscaping store. To complete the project, you will need a shovel, tape measure, wood stake and string, level, wheel barrel, soil tamper, gravel, landscaping stones, work gloves and goggles. Be sure to ask someone at the landscaping store if you need any additional materials.
- Begin your project by digging a trench 8″-10″ deep and 6″ wider than the block where you would like the wall to be. Fill the trench with 6″ level compacted gravel. Start laying the stones in the trench and checking each for level from side to side and front to back After the first layer is complete, begin laying your second layer of stones in a running bond pattern. If your first level was even, the second should be as well, keep checking You can use a string to ensure the stones remain level and straight. After you completed the first two levels, add drainage pipe along backside of first layer of block and cover with clean washed gravel, backfill the block (unless solid block is being used) with crushed stone 1/4″ to 1-1/2″ in size with less than 10% fines and fill behind the stones with 12″ of same crushed stone. Continue placing the stones until you have reached the desired height repeating the above steps every two layers.
Once you are finished adding levels to your wall, place landscaping fabric against the stones. This will keep the dirt from pushing through the stones and buckling the wall. Add topsoil and level off the soil along the top of the wall. From here, you can be creative and add flowers, plants or other landscaping elements.